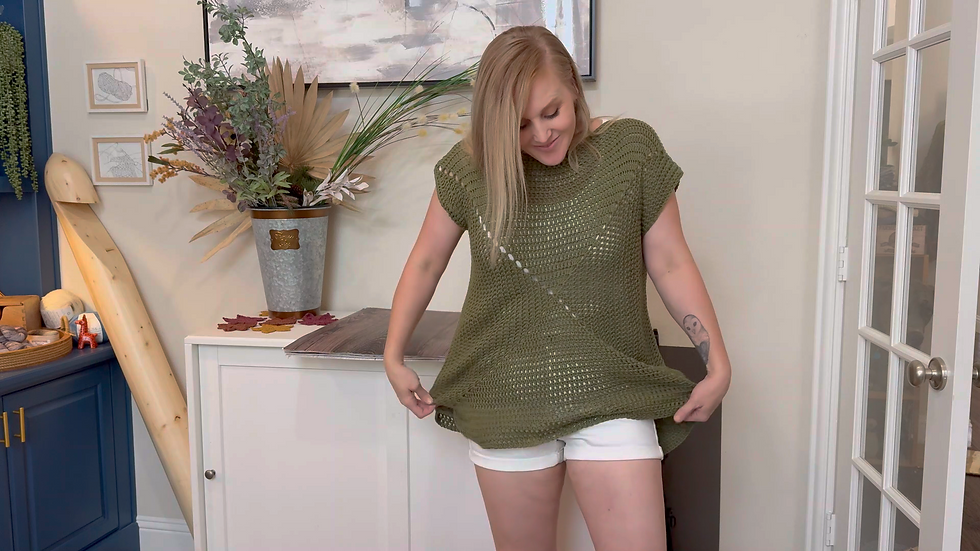
How to Finish Your Granny Square Top: Edging, Blocking, and Final Touches
- Tiffany

- Jul 18, 2025
- 3 min read
Updated: Aug 8, 2025

Can you believe we’re already at the finishing touches for our Granny Square Top Crochet Along?! Time seriously flies when you’re having fun with yarn. I’m so proud of you for making it this far — whether this is your first wearable or your tenth, it’s always exciting to get to this stage.
In this post, I’m sharing a few easy ways to clean up your project, add those optional finishing touches, and help your top look polished and professional. These tips are simple, beginner-friendly, and will give you confidence in your final result.
Check out the Video Here ▶ https://youtu.be/DJQO3-qyzzo
Left-Handed Video Here ▶ https://youtu.be/hSqmVAWYxpM
1️⃣ Try It On First: Make Adjustments Before Weaving in Ends
Before you grab your yarn needle to weave in all those tails, take a quick pause. Try your top on first!
Check how the neckline and armholes feel. Do you want to give yourself a little more room? Or maybe you’d like to tighten things up a bit? This is the perfect time to make adjustments.

If you need to, you can always remove a round or two at the neckline or armholes, or add a little extra if you want more coverage or length. Get it feeling good on your body before committing to those final finishing steps.
Once you’re happy with the fit — then go ahead and weave in all your ends. It might feel tedious, but trust me, the clean finish is worth it!
2️⃣ Simple Edging Options for Beginners
If you’re looking for an easy, clean way to finish your Granny Square Top, here are two great options:
✨ Single Crochet (sc) Edging — A round of single crochet around your neckline, armholes, wrists, and bottom hem gives you a polished, uniform look.

✨ Slip Stitch (sl st) Edging — If you prefer something super simple, a slip stitch edge provides a tidy, minimal finish that won’t distract from your squares.

Both are beginner-friendly and do the job beautifully. Pick whichever feels best for you! AND if you decide you don't like it, you can always take it out and try the other one. 😉
3️⃣ The Magic of Blocking
If you’ve never blocked a project before, this is a great opportunity to see just how much it can elevate your work.
Blocking helps:
✔ Straighten any wavy edges
✔ Clean up your sides and seams
✔ Make your stitches look more crisp and detailed
It’s that little extra step that gives your handmade garment a professional, polished finish — and it makes wearing it feel even better.
4️⃣ Caring for Your Finished Top
You’ve spent all this time making something beautiful. Let’s keep it looking that way!
Here are my quick care tips:
🫧 Wash: Hand wash gently and lay flat to dry.
If your yarn fiber says it can go in the washer/dryer, please use the gentle/delicate cycle.
You want to remove your top before it's completely dry to avoid your stitches shrinking,
fraying, or felting.
🪡 Store: Fold it flat instead of hanging it, so your granny squares don’t stretch out of shape over time.
I will actually fold my crochet top onto the hanger or in the bar part of the hanger if I don't want
to store it away.

5️⃣ Fun Ways to Style Your Granny Square Top
Now for the fun part — wearing it!Here are a few of my favorite styling ideas:
👚 Layer over a tank or camisole
👖 Pair with jeans, shorts, or a maxi skirt
👗 Throw it on over a dress for a playful, handmade vibe
There’s no wrong way to wear it — just find what makes you feel good!
6️⃣ Optional Personal Touches
If you want to go a step further, here are a few sweet ways to make your Granny Square Top uniquely yours:
💗 Add a “Handmade with Love” label
🧵 Try a small applique or surface crochet detail on one square
🪡 Stitch on a patch that reflects your style
These little touches make your finished project extra special.
Ready to Show It Off?
I hope this helped you finish your Granny Square Top with confidence! If you loved this project, don’t forget to tag me on social when you share your finished top — I absolutely LOVE seeing what you make.
And if you’re looking for more beginner-friendly crochet projects, styling tips, and tutorials, make sure you’re subscribed to my YouTube channel and my newsletter so you never miss what’s next.
Until next time…
I hope you have the BEST day!
~ Tiffany 💛


Comments